Sunday, August 13, 2017

WATERCOLOR WINGS CARD:

Hello there! We're hitting the road for vacation in a couple of hours, but thought I'd share a quickie before we head out:) I used the set Watercolor Wings for this card and started with a Powder Pink base-one of the new In Colors. I stamped the solid butterfly with Daffodil Delight ink, the outline image with Peekaboo Peach and the top layer with Calypso Coral ink. I stamped the body & antenna with Peekaboo Peach as well.

Next I stamped the dotted image along the bottom with Peekaboo Peach and added a strip of washi tape from the Basics Pack 3. I adhered strips of Gold Glimmer Paper to the back of the DSP using Liquid Tombow and attached to the base with SNAIL.

I stamped the sentiment with Peekaboo Peach ink and used the Classic Label Punch to punch it out. I attached it with Glue Dots and added one of the adorable In Color Bitty Bows. I finished it off with a few Basic Rhinestone Jewels.

This was a super quick & easy card and would brighten any friends day:) Well off to do the ritual and hopefully be able to cram everything into the car! Wish us luck:) I'll see you back here in a week. Thanks so much for stopping by!

Saturday, August 12, 2017

BANNERS FOR YOU CARD:

Hello there! Back with another card from my Card Buffet last week. I used the set Banners for You along with the coordinating Bunch of Banners Framelits. I started with a Very Vanilla base and used the Ticket Tear Border Punch along the bottom of a piece of DSP from the Wood Textures DSP Stack. I also recruited the help of the Flourish Thinlits for the beautiful strip on the side. I cut it from Very Vanilla Cardstock and adhered it to the back of the DSP with Liquid Tombow.

On top of that I added a Delicate White Doily with Snail. I stamped the banner with Sahara Sand ink and cut it out with the Bunch of Banners Framelits. I stamped the sentiment with the gorgeous new In Color Fresh Fig-it may be my favorite:) I then cut out the flourish with the Flourish Thinlits and attached it to the banners with Glue Dots, and adhered the whole thing to the doily with Dimensionals.

I then tied a bow around the flourish with a piece of Crumb Cake Classic Weave Ribbon. I tucked a Touches of Nature Element under the flourish with Liquid Tombow and added a few Basic Pearl Jewels. I love how this card has feminine touches and how the Wood Textures DSP makes it masculine as well-perfect for an Anniversary card:)

Well I'm off to work on laundry and get us packed for vacation tomorrow. Not sure if I'll get a post in tomorrow morning before we leave, so if not, I'll see you back here in about a week! Thanks so much for stopping by:)

Friday, August 11, 2017

BEST BIRDS CARD:

Hello there! Happy Friday to you:) I thought this was the perfect card to welcome the week-end:) This is another card you can make at my Card Buffet in September. I used the set Best Birds and the coordinating Birds & Blooms Thinlits. I started with a Very Vanilla Base and added another layer of Vanilla that I stamped with the Hardwood Background Stamp. I inked it up with Soft Suede and lightly rubbed a piece of scrap paper over it to remove some of the ink to get a softer background.

I stamped the background behind the bird full strength with Soft Suede ink, along with the bird & branch. I stamped the flowers with Pool Party ink onto the same color cardstock and used the thinlits to cut them all out. I stamped the sentiment with Soft Suede onto Very Vanilla and used the 1 1/4" Circle Punch to punch it out.

I colored the bird with Early Espresso, Pumpkin Pie and Bermuda Bay Watercolor Pencils. I used Early Espresso, Old Olive & Bermuda Bay for the branch & buds. I then blended the colors using a Blender Pen. I attached the sentiment with SNAIL, the branch with Glue Dots and the bird with Dimensionals. I used Glue Dots and Dimensionals to add the flowers.

I ran a piece of Basics Pack 2 Washi tape to the upper corner and overlapped it with a piece of Crumb Cake that I tied a Linen Thread bow around. I adhered it with a Dimensional. This usually isn't a set that I'd be drawn to, but I really like how it turned out:) I still have a few more cards to share so make sure to stop back tomorrow. Thanks so much for coming by:)

Thursday, August 10, 2017

SOMETHING FOR JOEY:

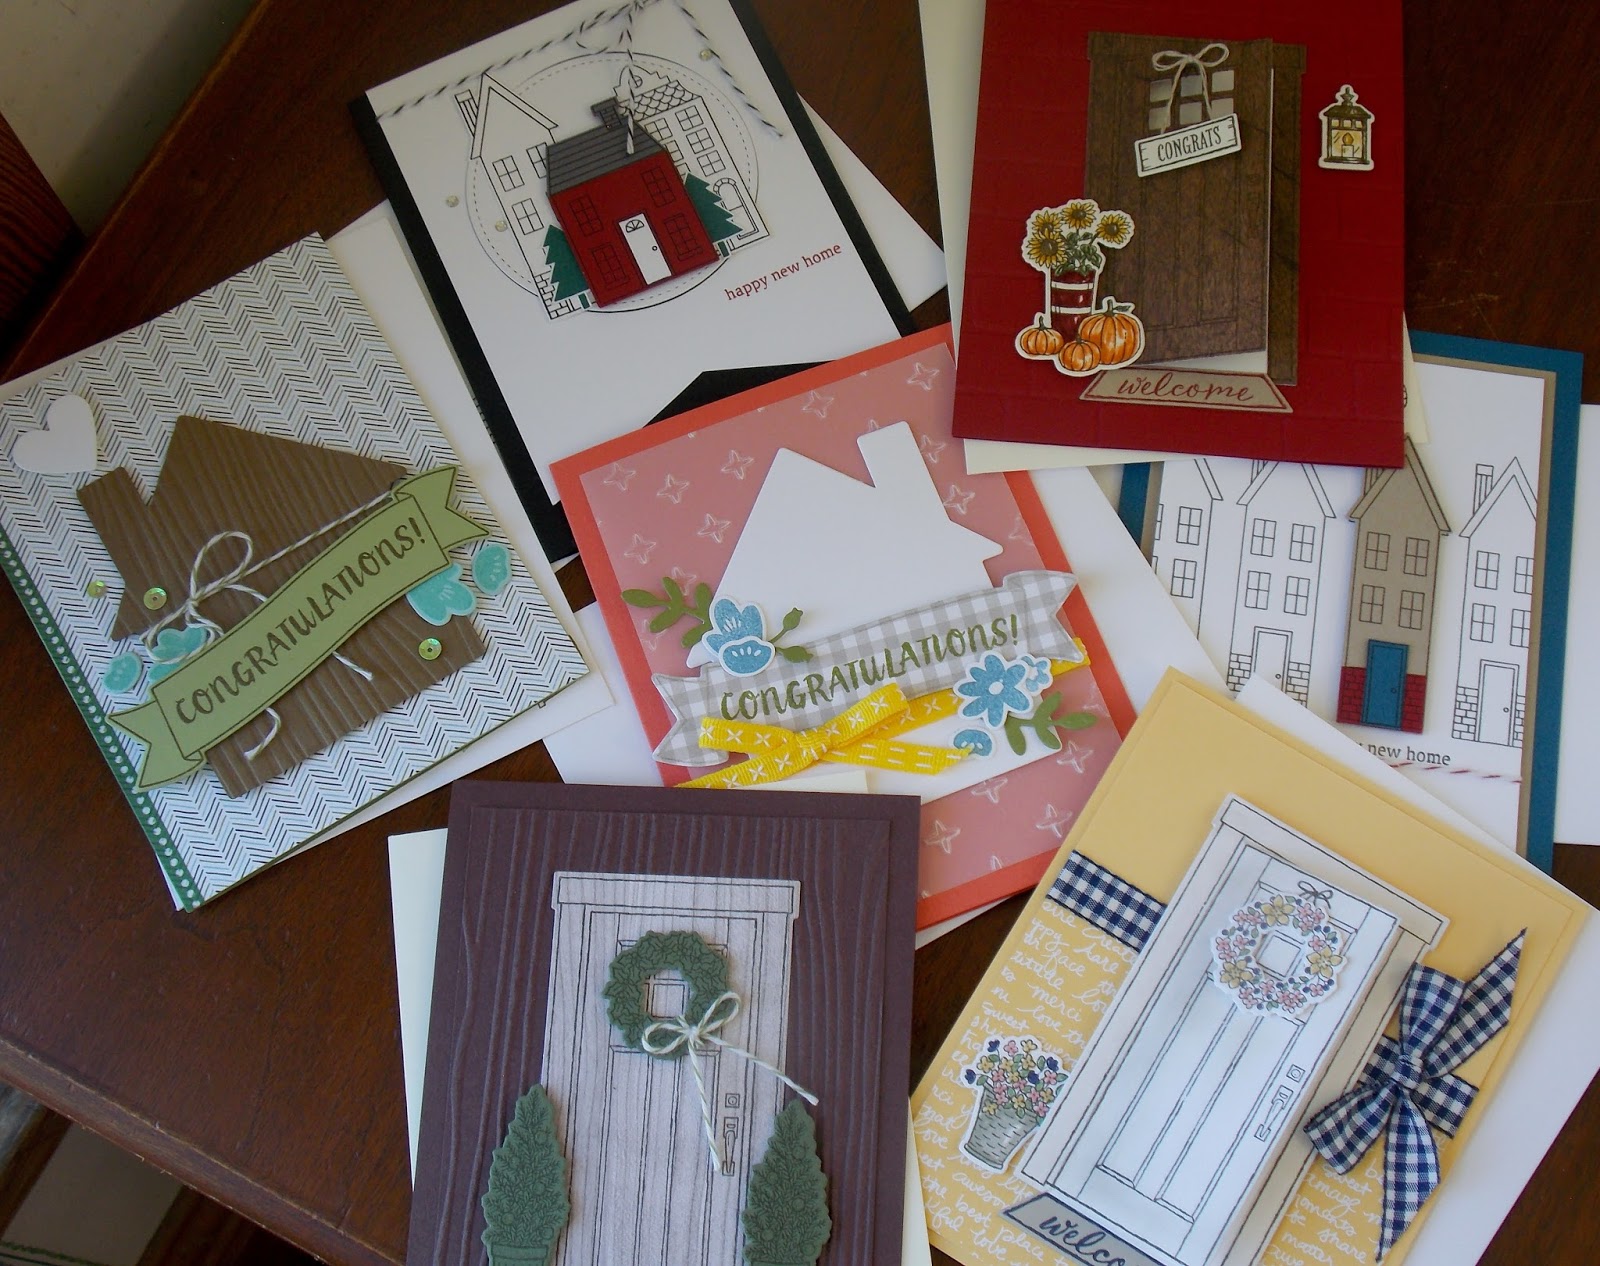
Hello there! It's a Two-fer Thursday! I have a friend who asked me to come up with some cards for his business, so I thought I'd share with you too:) I used 3 different bundles:

The first 3 cards feature the brand new At Home with You Bundle. I started with a Cherry Cobbler base and used the Brick Wall Embossing Folder. I stamped the door with Chocolate Chip onto a piece of DSP from the Wood Textures DSP Stack. I used the At Home Framelits to cut out the door-it even cut out the little window panes-adorable!

I stamped the mat with Cherry Cobbler ink onto Crumb Cake Cardstock. I stamped the sign, flowers and light with Chocolate Chip ink onto Very Vanilla Cardstock, and cut them all out with the framelits.

I used Cherry Cobbler, Crushed Curry, Always Artichoke, Soft Suede, Pumpkin Pie & So Saffron Markers to color everything. I added a Linen Thread bow to the sign and attached them all with Dimensionals.

The door even opens up to add an additional sentiment.

Here's the inside of the card.

Here's another option. I love how this bundle includes several different seasons. I started with a Chocolate Chip base and added another layer on top using a retired woodgrain embossing folder. I stamped the door with Chocolate Chip onto another design from the same DSP Stack.

I didn't use the framelit to open the door on this card and left it flat. Shut the front door-so many options! I added the greenery with Always Artichoke Cardstock and Chocolate Chip ink. The mat was stamped with Chocolate Chip onto Cherry Cobbler Cardstock. I cut it all out with the framelits and attached with Dimensionals.

Before I attached the wreath, I added an Old Olive Baker's Twine bow. It doesn't show up in the photos, but I added some shimmer with a Clear Wink of Stella Glitter Brush.

Here's the inside.

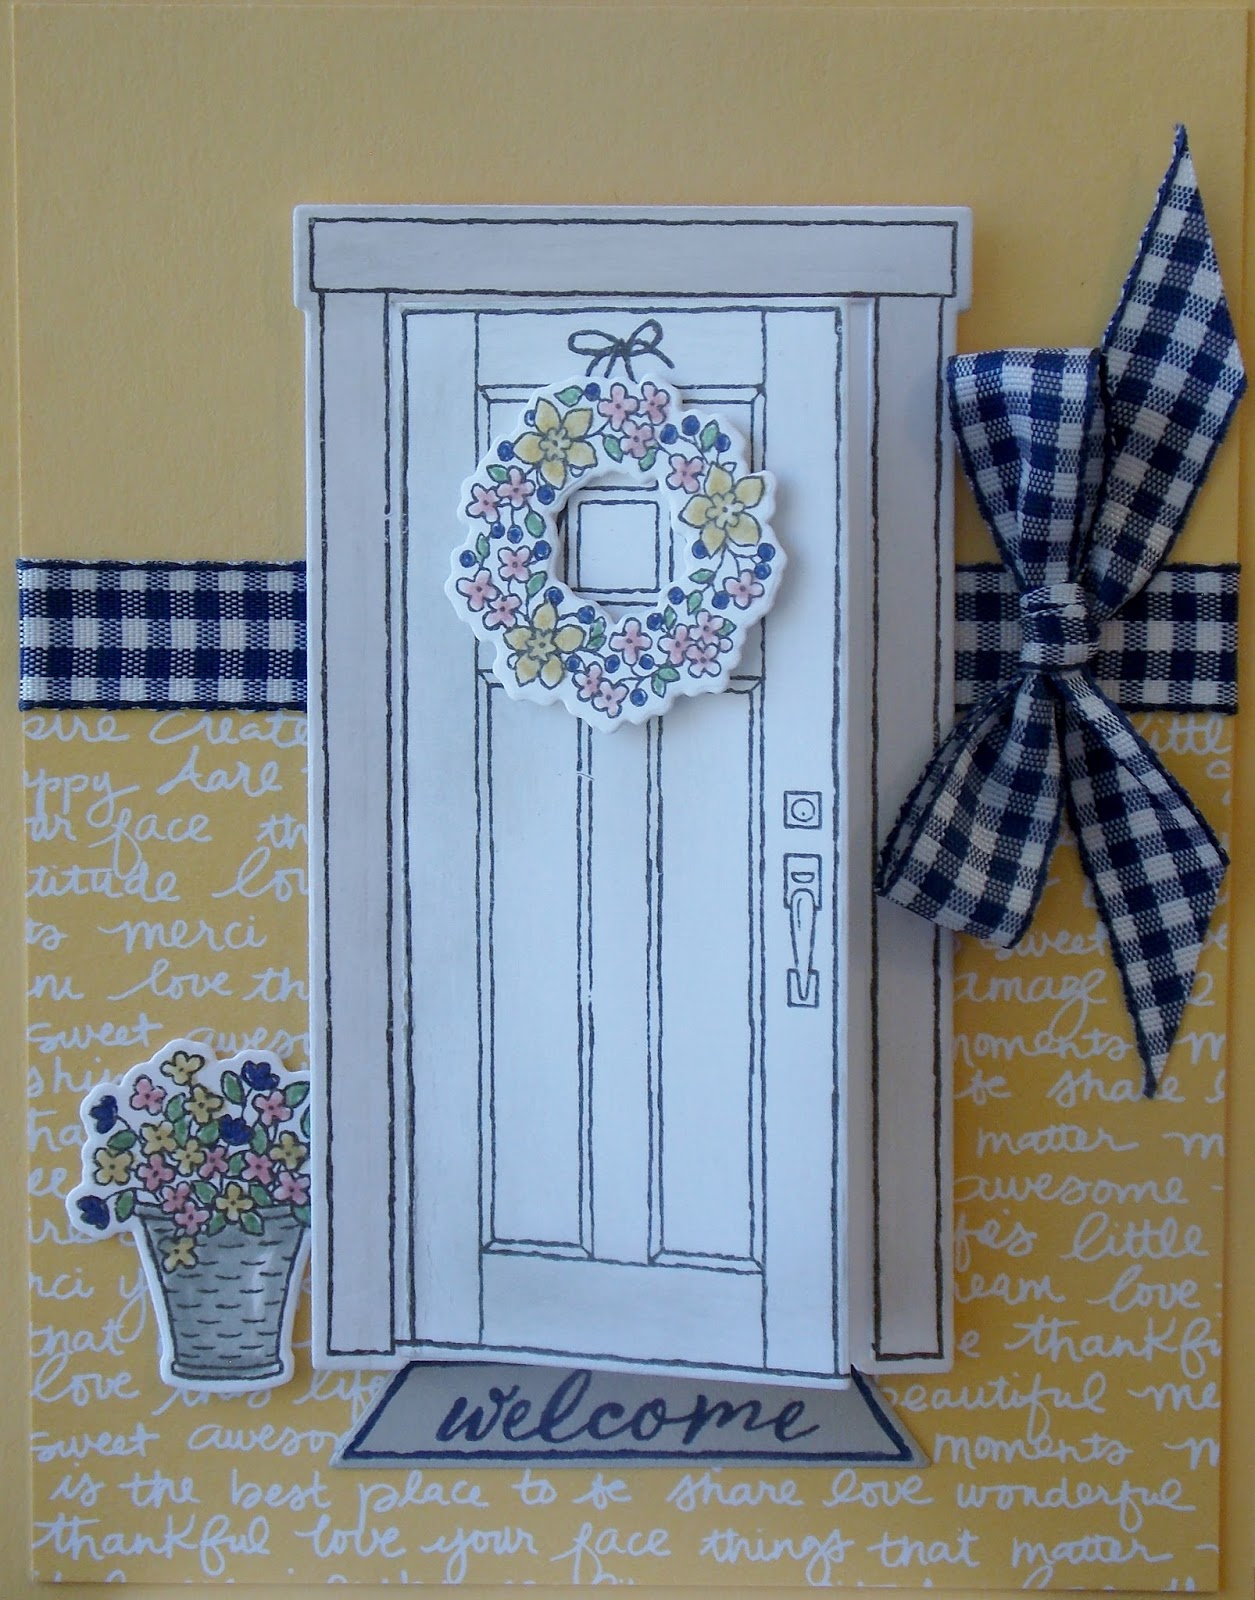
Here's a third option using the same At Home with You Bundle. I used a So Saffron base and added a layer of retired DSP. I added some of the darling new Night of Navy Gingham Ribbon around the DSP and attached a bow with a Glue Dot.

I stamped the door, wreath & flowers with Chocolate Chip ink onto Whisper White Cardstock and the mat with Night of Navy ink onto Sahara Sand Cardstock. I used the framelits to cut them all out.

I colored the basket and flowers with Sahara Sand, Wild Wasabi, So Saffron, Powder Pink & Night of Navy Markers. I adhered the frame, basket & wreath with Dimensionals.

Here's the sentiment behind the door.

And the inside.

Here's the 2nd bundle which features the Home Life Bundle. I started with a Pear Pizzazz base and added a piece of Coffee Break DSP. I ran a strip of wahsi tape down the side from the Basics Pack 2. I cut out the house from Soft Suede Cardstock using the coordinating Welcome Home Framelits, and then ran it through the Big Shot again using a retired woodgrain folder.

I wrapped a piece of Old Olive Baker's Twine around the house, tied a bow and attached it to the card base with Glue Dots. I stamped the sentiment with Soft Suede ink onto Pear Pizzazz Cardstock and stamped the flowers with Pool Party ink onto the same cardstock. I cut them all out with the framelits and attached the banner with Dimensionals.

I attached the flowers with Liquid Tombow and Glue Dots. I added a few of the brand new Iridescent Sequins with Liquid Tombow. I finished it off with a white heart using the Up & Away Thinlits.

Here's the inside.

Here's another option with the Home Life Bundle. I started with a Calypso Coral base and added a layer of Vellum Cardstock that I ran through the Bog Shot using the Sparkle Embossing Folder. I attached it to the base with rolled Glue Dots.

I used the Welcome Home Framelits to cut out the house from Whisper White Cardstock and the flowers which were stamped with Marina Mist ink. I cut the leaves from Old Olive Cardstock. I wrapped a piece of Daffodil Delight Double Stitched Ribbon around the vellum, added a bow and secured with Glue Dots.

I stamped the banner with Sahara Sand ink and the sentiment with Old Olive. I used the framelits to cut it out and attached it with Dimensionals.  I added the flowers with Liquid Tombow & Glue Dots.

Here's the inside.

And here's a couple more made with a retired bundle called Holiday Home, I believe. I started with a Dapper Denim Base and added a layer of Crumb Cake Cardstock. I stamped the houses & sentiment with Chocolate Chip ink onto Whisper White Cardstock. I wrapped a piece of retired Cherry Cobbler Baker's Twine around the top layer and tied a bow.


I stamped the heart with Cherry Cobbler ink and attached the top layer with Dimensionals. I stamped the house again onto Crumb Cake, Cherry Cobbler & Dapper Denim Carstock. I used the coordinating framelits to cut out the house, brick and door.

I glued them onto the Crumb Cake house & attached it on top of one of the houses using Dimensionals.

Here's the inside.

And finally, here's the last one, made with the retired Holiday Home again. I started with a Basic Black base and ran it through the Big Shot using the new Oh My Stars Embossing Folder. I used the Stitched Shapes Framelits to cut out a circle from a piece of Whisper White Cardstock. I flagged the bottom and attached the white to the base with rolled Glue Dots.

Oops, I need to back up. Before I attached it to the base I stamped the sentiment with Cherry Cobbler ink and wrapped a piece of Basic Black Baker's Twine around the top and tied a bow. I stamped the houses with Basic Black Archival ink onto Whisper White. I stamped the center house onto Cherry Cobbler, Whisper White & Basic Grey Cardstock. I used the framelits to cut them out.

I cut out the door and added the roof to the Cherry Cobbler house with Liquid Tombow. I stamped the trees with the brand new In Color Tranquil Tide and cut them out with my Paper Snips. I attached the house with Dimensionals.

And the inside.

I think I see a couple of these in our future for an upcoming card class. But hopefully Joe will like one of them! Thanks so much for stopping by:)

BIKE RIDE CARD:

Hello there! Here's another fun card we made at Card Buffet last week using the new Bike Ride Bundle. I started with a Real Red base and added a piece of Birthday Memories DSP. I then ran a strip of DSP from the Wood Textures DSP Stack along the bottom. I ran SNAIL above it and attached a piece of Crushed Curry Mini Chevron Ribbon to it and stapled one end.

Next I cut out 2 ovals from Whisper White Cardstock using the Layering Ovals Framelits and attached them together with SNAIL. I stamped the tires, basket, flowers & rack with Chocolate Chip ink. I stamped the bike frame with Real Red ink and cut out all the pieces with the Build A Bike Framelits. I colored the seat & handle bars with a Chocolate Chip Marker. I colored the basket & flowers with Crumb Cake & Crushed Curry Markers. I added some Red Glimmer Paper to the handlebars for fun:)

I attached the right tire to the oval with SNAIL and attached the bike frame over the top with Dimensionals. I then slid the left tire underneath and attached with SNAIL. I added a tiny drop of Liquid Tombow to the back tire and attached the rack. I added the basket on top with a Dimensional. I stamped the sentiment with Chocolate Chip ink onto a strip of Crumb Cake and attached with Dimensionals.

I finished it off with a Touches of Nature Element with Liquid Tombow. They're wood on one side & white on the other-so fun! I then added another piece of ribbon and stapled it in place. This card just makes me smile thinking about all the bike rides I've finally been able to go on since my foot surgery. I just wish my bike was red like this one:) Stop back tomorrrow for another project I have to share with you. Thanks so much for coming by!

Wednesday, August 9, 2017

COFFEE CAFE CARD:

Hello there! Here's one of my favorites from my Card Buffet. We used the new Coffee Cafe Bundle and this card was a hit! I started with a Crumb Cake base and stamped the hearts and stripe along the edge with Crumb Cake ink. I cut out a circle from the Coffee Break DSP using the Stitched Shapes Framelits.

Now for the really cool part! We tried out the new Embossing Paste and it's so much fun to work with! I made a stencil for the whipped cream by using one of the Coffee Cups Framelits on a Window Sheet. I anchored the stencil onto the DSP circle with some retired washi tape and swirled the Embossing Paste over the stencil like frosting a cake. I removed the stencil and set it aside to dry.

Next I stamped the cup with Early Espresso ink onto Powder Pink Cardstock-one of the new In Colors! I added a few hearts using Powder Pink ink. I stamped the straw with Garden Green ink and used the Coffee Cups Framelits to cut them out. I colored part of the sentiment using a Garden Green Marker and stamped it onto a piece of Whisper White Cardstock. I flagged one end and attached it to the cup with SNAIL. I cut a skinny strip of Coffee Break DSP and attached it with Liquid Tombow, slightly overlapping the DSP.

Once the Embossing Paste was dry, I adhered the circle to the card base with SNAIL. I attached the cup with Dimensionals and tucked the straw inside the cup using Liquid Tombow. I finished it off with a fun, new Corrugated Element. This will be the perfect bundle to use for my upcoming Coffee Break & Cards Class coming up in October. I'll be sharing more info about a bunch of new & exciting classes coming up in the Fall. Can't wait!!! Make sure to stop back again tomorrow:) Thanks so much for coming by!